
Building a Chat Interface with KendoReact—Part 1

Summarize with AI:
From customer support to collaborative tools, chat interfaces are vital to UX. Explore how the KendoReact Chat component simplifies adding chat to React applications.
Modern applications frequently feature chat interfaces to enhance communication between users—or with bots. From customer support chatbots to collaborative tools and social platforms, these interfaces are important for delivering engaging and interactive user experiences.
In today’s article, we’ll explore the process of building a robust chat interface using the React Chat component from Progress KendoReact. Whether you’re new to building chat interfaces or looking to implement more advanced features, this article will help you understand how KendoReact makes this process easy.
The KendoReact Chat Component
The KendoReact Chat component simplifies creating chat sessions and is part of the KendoReact Conversational UI package. It supports real-time conversations with features like quick actions, attachments and customizable messages, enabling developers to deliver rich and engaging chat experiences. Like all KendoReact components, it’s built with accessibility in mind.
The React Chat component is distributed through the @progress/kendo-react-conversational-ui package and can be imported directly:
import { Chat } from "@progress/kendo-react-conversational-ui";
With the Chat component available, here’s how to create a simple chat interface:
import React, { useState } from "react";
import { Chat } from "@progress/kendo-react-conversational-ui";

const user = {
  id: 1,
  avatarUrl:
    "https://demos.telerik.com/kendo-react-ui/assets/dropdowns/contacts/RICSU.jpg",
  avatarAltText: "User Avatar",
};

const bot = { id: 0 };

const initialMessages = [
  {
    author: bot,
    text: "Hello! I'm your assistant bot. How can I help you today?",
    timestamp: new Date(),
  },
];

const App = () => {
  const [messages, setMessages] = useState(initialMessages);

  const addNewMessage = (event) => {
    const userMessage = event.message;
    const botResponse = {
      author: bot,
      text: `You said: "${userMessage.text}"`,
      timestamp: new Date(),
    };

    setMessages([...messages, userMessage]);
    setTimeout(() => setMessages((prev) => [...prev, botResponse]), 1000);
  };

  return (
    <Chat
      user={user}
      messages={messages}
      onMessageSend={addNewMessage}
      placeholder="Type your message..."
      width={400}
    />
  );
};

export default App;
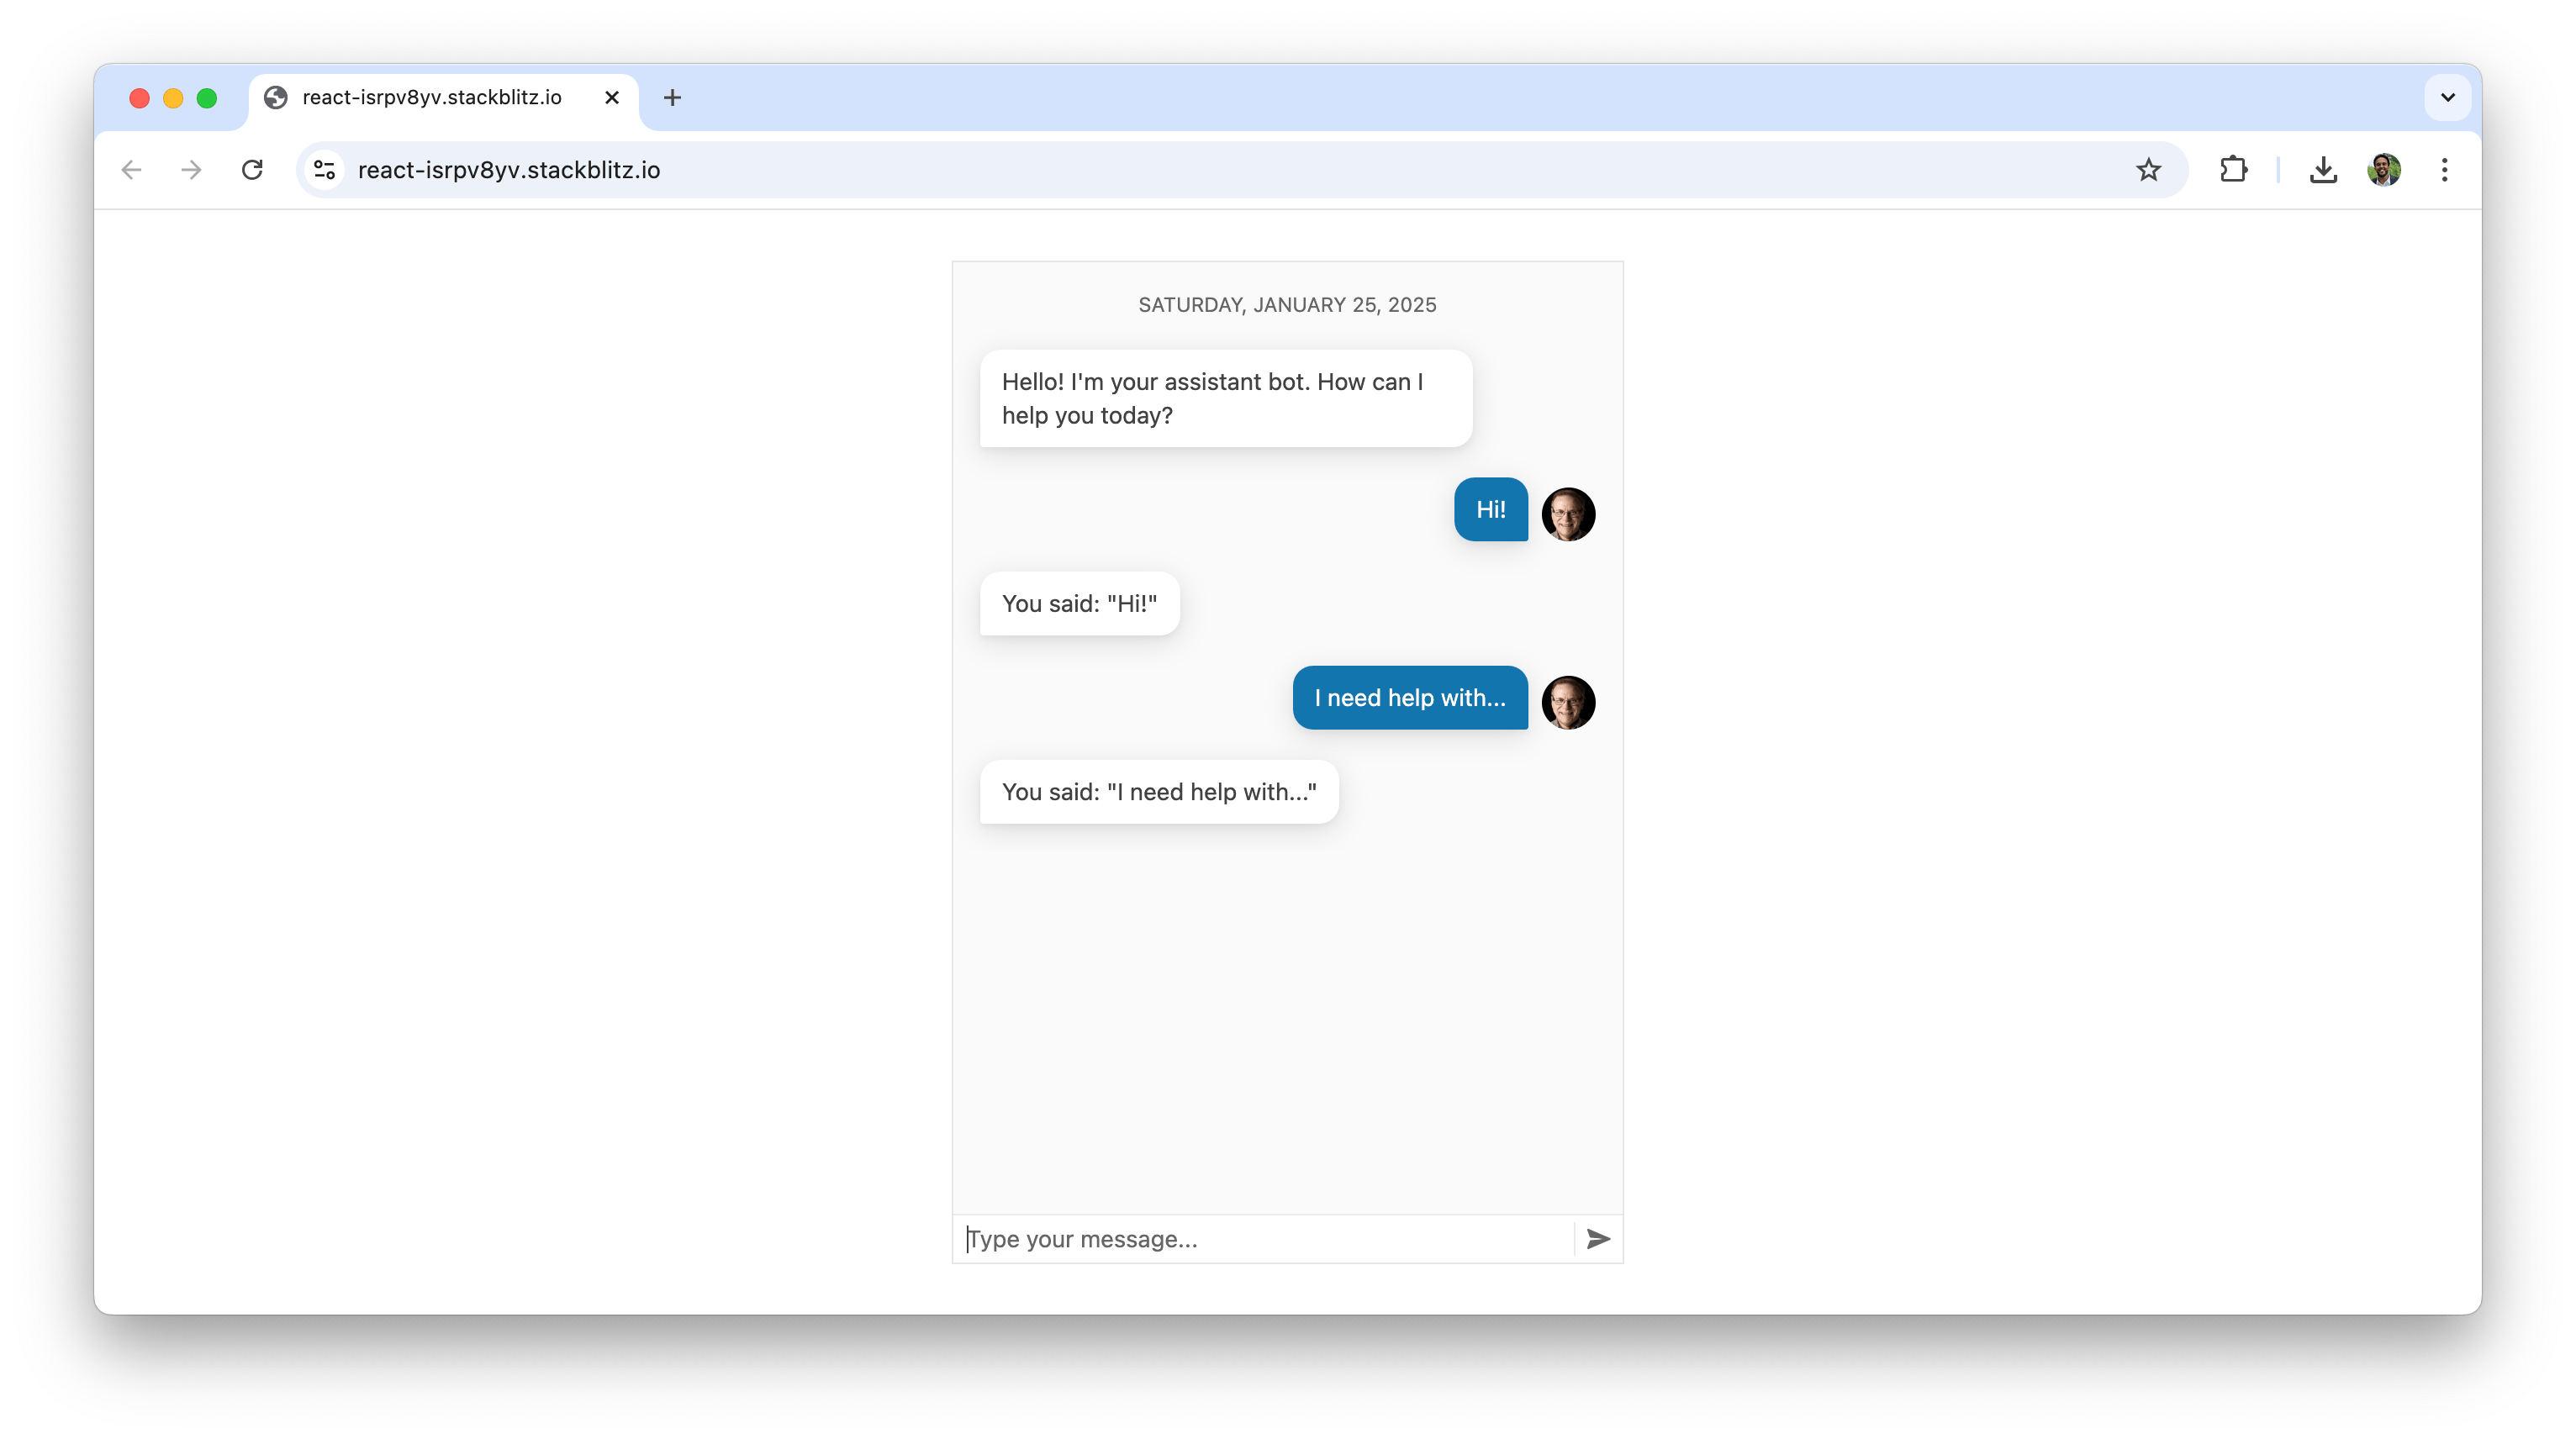
The above example sets up a simple chat interface using the Chat component, where messages are managed through state. User inputs trigger a function to display the user’s message and a delayed bot response. When running the above, we’ll see a basic chat interface where the bot responds dynamically to user messages. Messages the user sends appear on the right, while those from the bot are displayed on the left.

Note: The bot responses here are static. For a more dynamic experience, we could integrate external APIs to provide context-aware replies. Stay tuned for an upcoming article on enhancing this chatbot functionality!
While the basic setup works well for simple use cases, the KendoReact Conversational UI package offers additional features to enhance functionality and user experience. We’ll discuss some of these below.
Message Templates
Message templates allow us to style messages uniquely, adding branding or specific formatting. This can be done by customizing the messageTemplate property.
import React, { useState } from "react";
import { Chat } from "@progress/kendo-react-conversational-ui";

const user = {
  id: 1,
  avatarUrl:
    "https://demos.telerik.com/kendo-react-ui/assets/dropdowns/contacts/RICSU.jpg",
  avatarAltText: "User Avatar",
};

const bot = { id: 0 };

const initialMessages = [
  {
    author: bot,
    text: "Hello! I'm your assistant bot. How can I help you today?",
    timestamp: new Date(),
  },
];

const App = () => {
  const [messages, setMessages] = useState(initialMessages);
  const addNewMessage = (event) => {
    // ...
  };

  const CustomMessageTemplate = (props) => (
    <div className="k-chat-bubble">
      <strong>{props.item.author.id === user.id ? "You:" : "Bot:"}</strong>
      <p>{props.item.text}</p>
    </div>
  );

  return (
    <Chat
      user={user}
      messages={messages}
      onMessageSend={addNewMessage}
      messageTemplate={CustomMessageTemplate}
      placeholder="Type your message..."
      width={400}
    />
  );
};

export default App;
With the above example, the newly added message template adds labels like "You:" or "Bot:" before messages.
Adding Suggested Actions
Suggested actions simplify user interactions by providing predefined options for responses or actions. We can add these suggested actions by using the suggestedActions field of a message object.
import React, { useState } from "react";
import { Chat } from "@progress/kendo-react-conversational-ui";

const user = {
  id: 1,
  avatarUrl:
    "https://demos.telerik.com/kendo-react-ui/assets/dropdowns/contacts/RICSU.jpg",
  avatarAltText: "User Avatar",
};

const bot = { id: 0 };

const initialMessages = [
  {
    author: bot,
    text: "How can I assist you?",
    suggestedActions: [
      { type: "reply", value: "Tell me a joke" },
      { type: "reply", value: "What’s the weather?" },
    ],
  },
];

const App = () => {
  const [messages, setMessages] = useState(initialMessages);
  const addNewMessage = (event) => {
    // ...
  };

  const onActionExecute = (event) => {
    const action = event.action.value;
    const botResponse = {
      author: bot,
      text: `You selected: "${action}"`,
      timestamp: new Date(),
    };
    setMessages([...messages, botResponse]);
  };

  return (
    <Chat
      user={user}
      messages={messages}
      onMessageSend={addNewMessage}
      onActionExecute={onActionExecute}
      placeholder="Type your message..."
      width={400}
    />
  );
};
export default App;
With the above change, the suggested actions of “Tell me a joke” and “What’s the weather?” are now presented to the user right after the initial message of “How can I assist you?” When the user clicks one of these actions, it becomes a response message.
Integrating Attachments
Attachments enhance chat conversations by allowing multimedia content, such as images, videos or additional context, to be included with messages. By default, the KendoReact Chat component displays attachments as a carousel or card deck below the message. Using the attachmentLayout property, we can also switch to a list layout.
import * as React from "react";
import { Chat } from "@progress/kendo-react-conversational-ui";

const user = {
  id: 1,
  name: "John",
};

const bot = {
  id: 0,
};

const attachments = [
  {
    content: "The Westin Copley Place, Boston",
    contentType: "hotel",
  },
  {
    content: "Boston Park Plaza",
    contentType: "hotel",
  },
  {
    content: "Sheraton Boston Hotel",
    contentType: "hotel",
  },
  {
    content: "InterContinental Boston",
    contentType: "hotel",
  },
];

const initialMessages = [
  {
    author: bot,
    text: "A message with attachments carousel",
    attachments: attachments,
  },
  {
    author: bot,
    text: "A message with attachments list",
    attachmentLayout: "list",
    attachments: attachments,
  },
];

const App = () => {
  const [messages] = React.useState(initialMessages);

  return (
    <div>
      <Chat
        user={user}
        messages={messages}
        width={400}
        placeholder={"Type a message..."}
      />
    </div>
  );
};

export default App;
In the above example, both the carousel and list layouts are presented one after the other.
Toolbar
The toolbar of the KendoReact Chat component allows us to add interactive actions by providing an area where we can include buttons or other UI elements. Below is an example of implementing a toolbar for uploading attachments like files, images or documents:
import * as React from "react";
import { Chat } from "@progress/kendo-react-conversational-ui";
import { Button } from "@progress/kendo-react-buttons";
import { imageAddIcon } from "@progress/kendo-svg-icons";

const AttachmentTemplate = (props) => {
  const attachment = props.item;
  return (
    <div className="k-card k-card-type-rich">
      <div className="k-card-body quoteCard">
        <img
          style={{ maxHeight: "120px" }}
          src={attachment.content}
          alt="attachment"
          draggable={false}
        />
      </div>
    </div>
  );
};

const user = {
  id: 1,
  avatarUrl:
    "https://demos.telerik.com/kendo-react-ui/assets/dropdowns/contacts/RICSU.jpg",
  avatarAltText: "KendoReact Conversational UI RICSU",
};

const App = () => {
  const fileUpload = React.createRef();
  const [showToolbar, setShowToolbar] = React.useState(false);
  const [messages, setMessages] = React.useState([]);

  const handleInputChange = (e) => {
    const file = e.target.files[0];
    const reader = new FileReader();

    reader.onloadend = (event) => {
      const message = {
        author: user,
        text: "",
        attachments: [
          {
            content: event.target ? event.target.result : "",
            contentType: "image/",
          },
        ],
      };

      setShowToolbar(false);
      setMessages([...messages, message]);
    };

    reader.readAsDataURL(file);
  };

  const Toolbar = () => (
    <span>
      <input
        type="file"
        onChange={handleInputChange}
        style={{ display: "none" }}
        ref={fileUpload}
      />
      <Button
        themeColor="base"
        fillMode="flat"
        svgIcon={imageAddIcon}
        rounded="medium"
        onClick={() => fileUpload.current.click()}
      />
    </span>
  );

  const addNewMessage = (event) => {
    setMessages([...messages, event.message]);
  };

  return (
    <div>
      <Chat
        user={user}
        messages={messages}
        onMessageSend={addNewMessage}
        placeholder="Type a message..."
        width={400}
        attachmentTemplate={AttachmentTemplate}
        showToolbar={showToolbar}
        onToolbarActionExecute={() => setShowToolbar(!showToolbar)}
        toolbar={<Toolbar />}
      />
    </div>
  );
};

export default App;
With the above, a custom toolbar component is created, allowing users to upload attachments. The React Button component component from KendoReact provides the UI for triggering the file upload. When a file is selected, it’s read and added to the chat as an attachment, rendered using the AttachmentTemplate component.
Wrap-up
The KendoReact Chat component streamlines the process of building chat interfaces, offering features like dynamic responses, templates, quick actions, attachments and toolbars to enhance user interactions. Its functionality greatly simplifies the creation of engaging and interactive chat experiences.
In our next article, we’ll look into how AI can be integrated to deliver smarter and more interactive bot responses. For further information on the KendoReact Chat component, visit the official documentation! And if you haven’t already signed up, get your free trial started today!

Hassan Djirdeh
Hassan is a senior frontend engineer and has helped build large production applications at-scale at organizations like Doordash, Instacart and Shopify. Hassan is also a published author and course instructor where he’s helped thousands of students learn in-depth frontend engineering skills like React, Vue, TypeScript, and GraphQL.
Related Posts
Comments
All articles
Topics
Web MobileMobile
Desktop
Design
Productivity
People
