Blazor Basics: Creating a Todo App Using Blazor Server

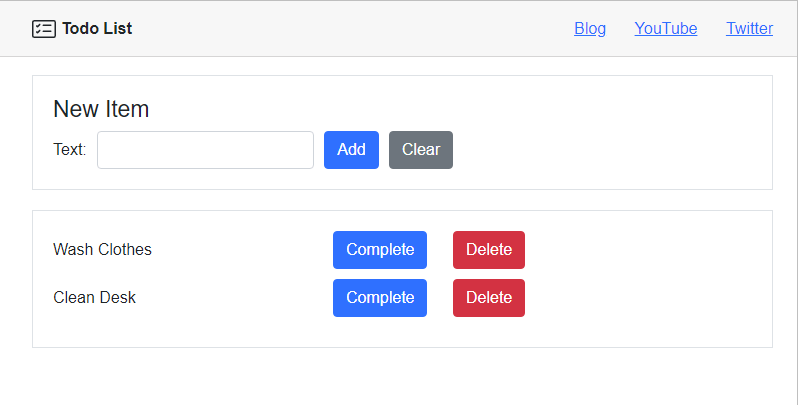
Learning by doing is still the best approach. In this article, we build a simple todo app as a Blazor Server application.
What’s better than abstract theory? Correct, learning by doing. In this article, we will implement a simple todo list as a Blazor Server application.

Requirements
We will implement the following features:
- Show a list of todo items
- Add a todo item to the list
- Remove a todo item from the list
- Mark a todo item as completed
- Mark a todo item as uncompleted
To focus on Blazor development and to keep it as simple as possible, we do not use any Blazor user interface libraries.
However, a user interface library such as Progress Telerik UI for Blazor will help make it look fantastic and improve the user experience.
How Does Blazor Server Work Again?
If it’s the first time you hear about Blazor Server, I suggest reading the series introduction article Blazor Basics: What is Blazor.
A quick summary nonetheless: Blazor Server doesn’t use WebAssembly. All interaction code runs on the server. The browser communicates with the server using a persistent SignalR web socket connection. A Blazor Server application needs to run on a web server supporting ASP.NET Core applications.
This article will show what those architectural boundaries mean for Blazor Server application development.
Setting up the Project in Visual Studio
We need to set up the project before we can start writing code. We use the default Blazor Server project template within Visual Studio.

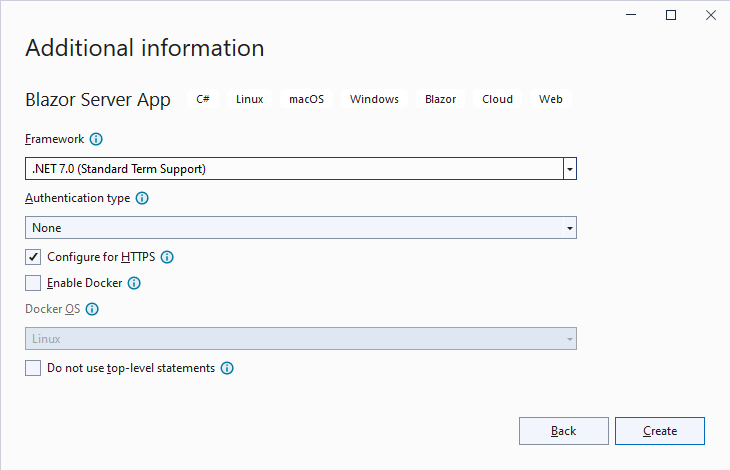
I use the latest .NET version, no authentication, configure HTTPS without Docker, and use top-level statements when creating the project using the Visual Studio project creation wizard.
The template comes with a few files we don’t need and quickly remove:
- Data/
- WeatherForecast.cs
- WeatherForecastService.cs
- Pages/
- Counter.razor
- FetchData.razor
- Shared/
- NavMenu.razor
- SuveyPrompt.razor
In the Index.razor component, we need to remove the previously deleted SurveyPrompt component. The resulting Index.razor file looks like this:
@page "/"

<PageTitle>Index</PageTitle>
<h1>Hello, world!</h1>
Next, we need to remove the deleted NavMenu component from the MainLayout.razor component. The resulting MainLayout.razor component looks like this:
@inherits LayoutComponentBase

<PageTitle>TodoAppBlazorServer</PageTitle>

<div class="page">
    <main>
        <div class="top-row px-4">
            <a href="https://docs.microsoft.com/aspnet/" target="_blank">About</a>
        </div>

        <article class="content px-4">
            @Body
        </article>
    </main>
</div>
We also need to change the Program.cs file and remove the service registration for the WeatherForecastService. The resulting Program.cs file looks like
this:
var builder = WebApplication.CreateBuilder(args);

builder.Services.AddRazorPages();
builder.Services.AddServerSideBlazor();

var app = builder.Build();

if (!app.Environment.IsDevelopment())
{
    app.UseExceptionHandler("/Error");
    app.UseHsts();
}

app.UseHttpsRedirection();
app.UseStaticFiles();
app.UseRouting();
app.MapBlazorHub();
app.MapFallbackToPage("/_Host");

app.Run();
If you want to skip the process of setting up the project template, you can also clone the project’s GitHub repository and head to the first commit labeled “Cleaned-up Blazor Server project template.”
Now, we’re ready to implement the Todo App.
Listing Todo Items
As the first step, we need a data class that contains the information for a todo item. We create a TodoItem.cs file in the root folder of the project and implement the following class:
namespace TodoAppBlazorServer;

public class TodoItem
{
    public TodoItem(string text)
    {
        Text = text;
    }

    public string Text { get; set; }
    public bool Completed { get; set; }
}
The TodoItem class contains a Text property of type string and a Completed property of type bool.
The Text property is initialized in the constructor when creating an instance of the TodoItem class.
The Completed property isn’t explicitly initialized and, therefore, will have the default value of the bool type, which is false.
Hint: You could also use a record type for this data class definition. However, I wanted to keep it as simple as possible for this tutorial.
public record TodoItem(string Text, bool Completed = false);
With the data class in place, we now want to implement the Index.razor component, which is the default page of the Blazor Server web application.
First of all, we need to add a code section to the component and create a list of TodoItem objects.
@code {
    private IList<TodoItem> Todos { get; set; } = new List<TodoItem>();

    protected override void OnInitialized()
    {
        Todos.Add(new TodoItem("Wash Clothes"));
        Todos.Add(new TodoItem("Clean Desk"));
    }
}
We also override the OnInitialized lifecycle method allowing us to execute when the component is initialized.
We add two todo items to the list.
Next, we want to show the todo items on the page. I insert the following template code that uses the built-in PageTitle component. We also use the foreach iteration statement to render
all of the todo items in the Todos property defined in the code section of the component.
@page "/"

<PageTitle>Todo List</PageTitle>

<div class="border" style="padding: 20px; margin-top: 20px;">
    <div style="display: flex; flex-direction: column">
        @foreach (var todo in Todos)
        {
            <div class="flex-center" style="margin-bottom: 10px;">
                <div class="@ItemClass(todo)" style="width: 280px;">@todo.Text</div>
            </div>
        }
    </div>
</div>
We use the ItemClass method to create the CSS classes added to the div element containing the text of the todo item. We need to add this method to the code section of the component:
public string ItemClass(TodoItem item)
{
    return item.Completed ? "item-completed":"  ";
}
It’s a common way when using Blazor to have a conditional statement deciding what CSS classes to use. In this case, we add the “item-completed” class to the div in case the todo item is completed.
Otherwise, we return an empty string.
Next, we open the wwwroot/css/site.css file and add the following definition for the “item-completed” class:
.item-completed {
    text-decoration: line-through;
}
It strikes the text through, and as seen before, this class is applied when the todo item is completed.
Implementing the TodoItemService
We currently define and fill the list of todo items within the Index.razor component. In a real application, the data will most likely be stored in any kind of database.
Since we’re working with Blazor Server and all of the code is executed server-side, we could call the database directly from within the index.razor component.
Defining the ITodoService Interface
However, also when using Blazor, it’s best practice to follow the separation of concern principle. Therefore, I create an ITodoService interface and a TodoService implementation
for the interface in the Services folder.
The ITodoService interface looks like this:
namespace TodoAppBlazorServer.Services;

public interface ITodoService
{
    public void Add(TodoItem item);
    public IEnumerable<TodoItem> GetAll();
}
It defines a void Add method accepting a TodoItem object as its sole parameter. We will use it later to add a todo item to the data store.
The GetAll method returns an IEnumerable of all stored todo items.
Implementing the Service
The implementation in the TodoService.cs file is also simple:
namespace TodoAppBlazorServer.Services;

public class TodoService : ITodoService
{
    private readonly IList<TodoItem> _todoItems;

    public TodoService()
    {
        _todoItems = new List<TodoItem> {
            new TodoItem("Wash Clothes"),
            new TodoItem("Clean Desk")
        };
    }

    public void Add(TodoItem item)
    {
        _todoItems.Add(item);
    }

    public IEnumerable<TodoItem> GetAll()
    {
        return _todoItems.ToList();
    }
}
For this tutorial, we still want to store all the todo items in memory. Therefore, we define a private field that holds all the todo items.
In the constructor, we initialize the private field containing the todo items and fill the collection with the two todo items previously directly added in the Index.razor file.
The Add method takes the todo item provided as a method argument and adds it to the list stored in the private field.
The GetAll method accesses the private field and returns a copy of the data using the ToList method.
Registering the Service
We need to register the service in the Program.cs file to make it available to the integrated dependency injection mechanism.
We add the following line after the AddServerSideBlazor method call on the builder.Services object within the Program.cs file:
builder.Services.AddSingleton<ITodoService, TodoService>();
We can now use the TodoService within the Index.razor component.
First of all, we need to add the following directives after the @page directive at the top of the Index.razor file:
@using TodoAppBlazorServer.Services;
@inject ITodoService _todoService;
The first line adds a using statement making the types within the Services namespace available within the whole component.
Next, we use the @inject directive to add the registered singleton implementation for the ITodoService type to the component using the _todoService variable.
We can now replace the initialization of the Todos property within the code section of the component with the following implementation:
protected override void OnInitialized()
{
    Todos = _todoService.GetAll().ToList();
}
We use the _todoService variable to access the injected service implementation and call the GetAll method to retrieve all stored todo items.
Adding a Todo Item
As the next step, we want to add items to the todo list. We create a new TodoItemForm.razor component in the Shared folder that will hold a form accepting user input.
@using TodoAppBlazorServer.Services;
@inject ITodoService _todoService;

<EditForm Model="@NewItem" OnSubmit="@ItemAdded">
    <div style="display: flex; align-items: center; width: 400px;">
        <div style="margin-right: 10px">Text:</div>
        <InputText
            @bind-Value="NewItem.Text"
            class="form-control"
            style="margin-right: 10px"
            id="Item" />
        <input
            type="submit"
            class="btn btn-primary"
            style="margin-right: 10px"
            value="Add" />
        <input
            type="reset"
            class="btn btn-secondary"
            value="Clear" />
    </div>
</EditForm>

@code {
    [Parameter]
    public required Action OnItemAdded { get; set; }

    private TodoItem NewItem = new TodoItem("");

    public void ItemAdded()
    {
        var newItem = new TodoItem(NewItem.Text);
        NewItem.Text = "";
        _todoService.Add(newItem);

        if (OnItemAdded != null)
        {
            OnItemAdded();
        }
    }
}
Again, we use the @using and @inject directives to make the ITodoService available within the component.
The component template uses the built-in EditForm component. We provide the NewItem property defined in the code section as the Model.
We also register the ItemAdded method as a callback for the OnSubmit method of the EditForm component.
We use a few divs to style the look and feel and use the built-in InputText component to show an input field. We use the @bind-Value attribute to
bind the Text property of the NewItem object to the input field.
In the code section, we define a parameter that exposes an action named OnItemAdded. It allows providing a callback method when using the TodoItemForm.razor component. We mark it
as required.
The ItemAdded method is executed when the user hits the submit button of the HTML form created by the built-in EditForm component. It takes the text input and creates a new
TodoItem instance before emptying the text of the input field.
Next, we call the TodoService and add the new item using its Add method. Finally, we check if an OnItemAdded callback is provided and call it if
it’s set.
Adding the TodoItemForm Component to the Index.razor Page
We add the implemented TodoItemForm component to the Index.razor page component.
The following template snippet is added between the PageTitle component and the listing of the todo items.
<div class="border" style="padding: 20px;">
    <h4>New Item</h4>
    <TodoItemForm OnItemAdded="@ItemAdded" />
</div>
We provide an ItemAdded method to the OnItemAdded parameter of the TodoItemForm component.
We need to implement that method in the code section of the Index.razor component.
public void ItemAdded()
{
    Todos = _todoService.GetAll().ToList();
    StateHasChanged();
}
Whenever an item is added to the TodoService, we want to reload the data to show the new item within the todo list. We need to call the StateHasChanged method to tell Blazor that
it needs to re-render the component in the browser.
Removing a Todo Item
Who knows the feeling when you are excited about the day ahead and put as many tasks on the todo list as come to your mind? Right, you’ll only be able to complete some of them. That’s where removing items from the list comes in handy.
First, let’s add a Delete method to the ITodoService interface.
public void Delete(TodoItem item);
Next, we need to implement it in the TodoService class.
public void Delete(TodoItem item)
{
    _todoItems.Remove(item);
}
In the Index.razor component, we add a DeleteItem method that has a single parameter of type TodoItem that we will use in the component’s
template.
public void ItemsChanged()
{
    Todos = _todoService.GetAll().ToList();
    StateHasChanged();
}

public void DeleteItem(TodoItem item)
{
    _todoService.Delete(item);
    ItemsChanged();
}
I also renamed the ItemsAdded method to ItemsChanged because we can use it in multiple places. When renaming the method, make sure it is also renamed in the template where it is
referenced within the OnItemAdded callback.
<TodoItemForm OnItemAdded="@ItemsChanged" />
Within the DeleteItem method, we first use the TodoService to delete the item in the data source.
On the following line, we call the ItemsChanged method to reload the data and call the StateHasChanged method. It makes sure that we have the current state of the data source reflected
on the page, including, for example, changes made by different users.
Finally, we change the component’s template to include a delete button for each listed todo item.
<div class="border" style="padding: 20px; margin-top: 20px;">
    <div style="display: flex; flex-direction: column">
        @foreach (var todo in Todos)
        {
            <div style="display: flex; margin-bottom: 10px;">
                <div
                    style="display: flex; align-items: center;margin-bottom: 10px;">
                    <div class="@ItemClass(todo)" style="width: 280px;">
                        @todo.Text
                    </div>
                </div>
                <div>
                    <button
                        class="btn btn-danger"
                        onclick="@(() => DeleteItem(todo))">Delete
                    </button>
                </div>
            </div>
        }
    </div>
</div>
We add a div wrapping the existing content within the foreach statement iterating through the todo items. We use some CSS to align the child divs
beside each other.
Next, we add a div containing a button. We use some Bootstrap CSS classes to make it look like a delete button, and we register the DeleteItem method implemented before as the callback method for the onclick property. Make sure to provide the todo variable as the argument for the DeleteItem method.
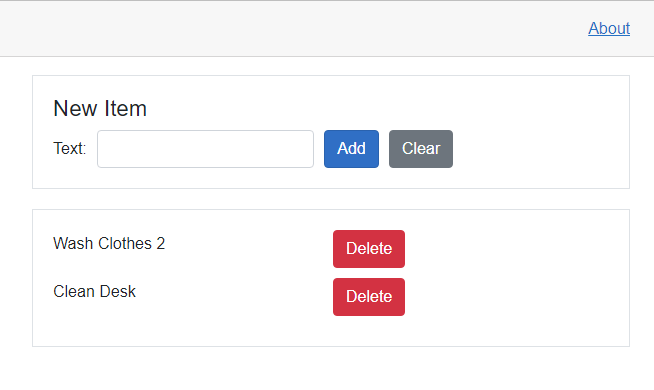
The application now looks like this:

We have a delete button beside each todo item. When we press the button, the item is removed from the list.
Completing a Todo Item
We can add and remove todo items, but we also want to feel the reward of completing items. And if we accidentally click on the complete button, we also want to be able to undo the action.
First, we will add two methods to the ITodoService interface.
public void Complete(TodoItem item);
public void Uncomplete(TodoItem item);
The implementation of both methods is similar.
public void Complete(TodoItem item)
{
    item.Completed = true;
}

public void Uncomplete(TodoItem item)
{
    item.Completed = false;
}
We change the state of the Completed variable of the provided TodoItem.
In the Index.razor component, we add the following two callback methods to the component’s code section:
public void CompleteItem(TodoItem item)
{
    _todoService.Complete(item);
    ItemsChanged();
}

public void UncompleteItem(TodoItem item)
{
    _todoService.Uncomplete(item);
    ItemsChanged();
}
For both methods, we use the previously defined Complete or Uncomplete methods on the TodoService. We also call the ItemsChanged method, similar to the implementation of the DeleteItem method.
Next, we add the template code between the todo item’s text and the delete button.
@if (todo.Completed)
{
    <div style="width: 120px">
        <button
            class="btn btn-primary"
            onclick="@(() => UncompleteItem(todo))">Uncomplete</button>
    </div>
}
@if (!todo.Completed)
{
    <div style="width: 120px">
        <button
            class="btn btn-primary"
            onclick="@(() => CompleteItem(todo))">Complete</button>
    </div>
}
We use an if statement to output a different template depending on the state of the todo item. We also provide the callback methods implemented above to the onclick handlers of
the HTML button elements.
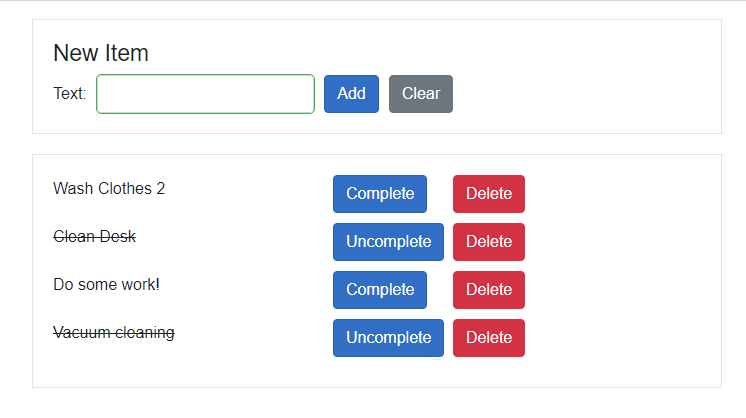
At the beginning of this article, we implemented the ItemClass method that now adds the class containing the strikethrough effect depending on the state of the TodoItem.

As we can see, we can now add new todo items, remove items that we don’t want on the list anymore, and complete and uncomplete todo items.
Getting the Source Code
If you happen to get stuck following this article, or you want to look at how I implemented the completed app, check out the project’s GitHub page. Feel free to clone the repository and add the features you like to improve and practice your Blazor development skills.
To continue learning, check out Claudio’s free Blazor Crash Course video series. It is a great starting point to get you up to speed with Blazor development, from implementing your first Blazor component to handling forms, using CSS, to building a simple dashboard.
And stay tuned to the Blazor Basics series here for more articles like this!

Claudio Bernasconi
Claudio Bernasconi is a passionate software engineer and content creator writing articles and running a .NET developer YouTube channel. He has more than 10 years of experience as a .NET developer and loves sharing his knowledge about Blazor and other .NET topics with the community.

